Pages

Sunday, 15 September 2013

Backpack - Denim scraps


Difficulty:

Cost:

$0-20 
depending on what you have in your fabric stash


How cool is this backpack?! 
This is another Ali creation in my attempts to use up my massive stash of denim pant legs, left over from many, many pairs of shorts. Denim is a great, tough material and I thought, what better to make from lovely strong fabric, but a backpack! 
This bag really doesn't take as much fabric as you might expect; I was able to make it entirely from pieces out of my scrap basket. 
It took one pair of jeans (after you've taken away the top for a pair of shorts) worth of denim, but I used two different coloured pant legs, one slightly darker than the other.
Then I used a brown pleather fabric for the base and handle as I wanted it to be nice and strong, however more denim would work perfectly well if you can't afford pleather. 
You only need a tiny amount of floral contrast, so it's a perfect way to use up something from your scrap basket. 
For the lining I just used some calico I had left over from another project.
Big long zippers can be expensive, and I was lucky to find both of these zips in my mum's stash. However if you aren't lucky enough to have such a stash at your disposal, find an old jacket in your local op shop which has a zip the length and colour you need. This is a much cheaper way of buying a zip, and you are more likely to find a cool vintage looking zip like the ones I used!


Materials:

1x pair of jeans
2x zips
floral fabric
lining fabric
pleather (optional)

Tools:

Sewing machine
Overlocker (optional)
Scissors

Pattern pieces:
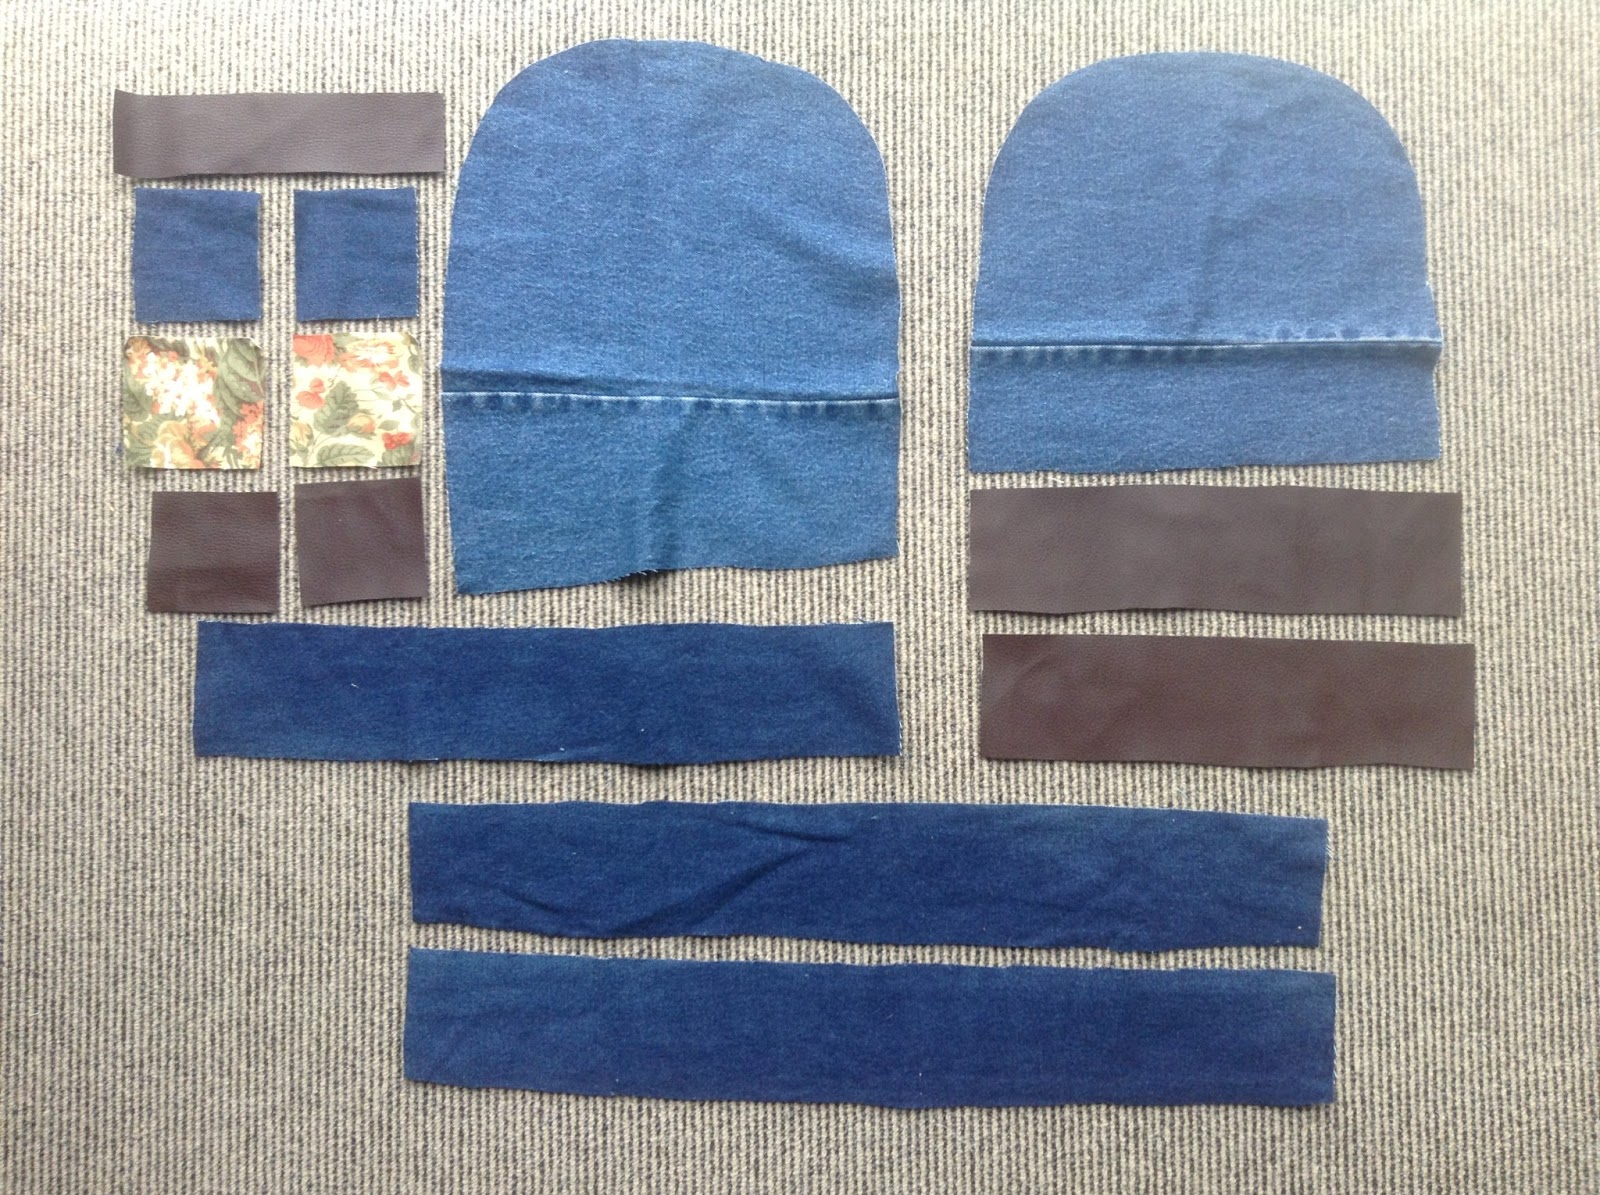

For outer bag:

1x back (13.5'' x 15'', rounded top)
1x front (13.5'' x 11.5'', rounded top)
1x front contrast (13.5 x 3.5'')
1x base (13.5 x 3.5)
1x top (21'' x 3.5'')
1x handle (9'' x 2'')
2x straps (26'' x 3.5'')
6x side (3.5'' x 3.5'')


For lining:

1x front (13.5'' x 15'', rounded top)
1x back (13.5'' x 15'', rounded top)
2x side (10'' x 3.5'')
1x base (13.5'' x 3.5'')
1x top (21'' s 3.5'')


For pocket:

1x top (picture says 9'', but make it 11''x5'')
1x front (8'' x 4'')
1x base (8'' x 1'')
2x side (1'' x 4'')
2x lining front (8'' x 4'')
2x lining side (1'' x 4'')
1x lining base (1'' x 8'')


Method:

Start by pinning and sewing the contrast front piece to the front, right sides together


Next sew the three side pieces together, right sides together, in an appropriate order


Then make the bag lining
Start by sewing the side lining pieces to the back, lining pieces up at the bottom


Then attach the base piece to the bottom of the front piece


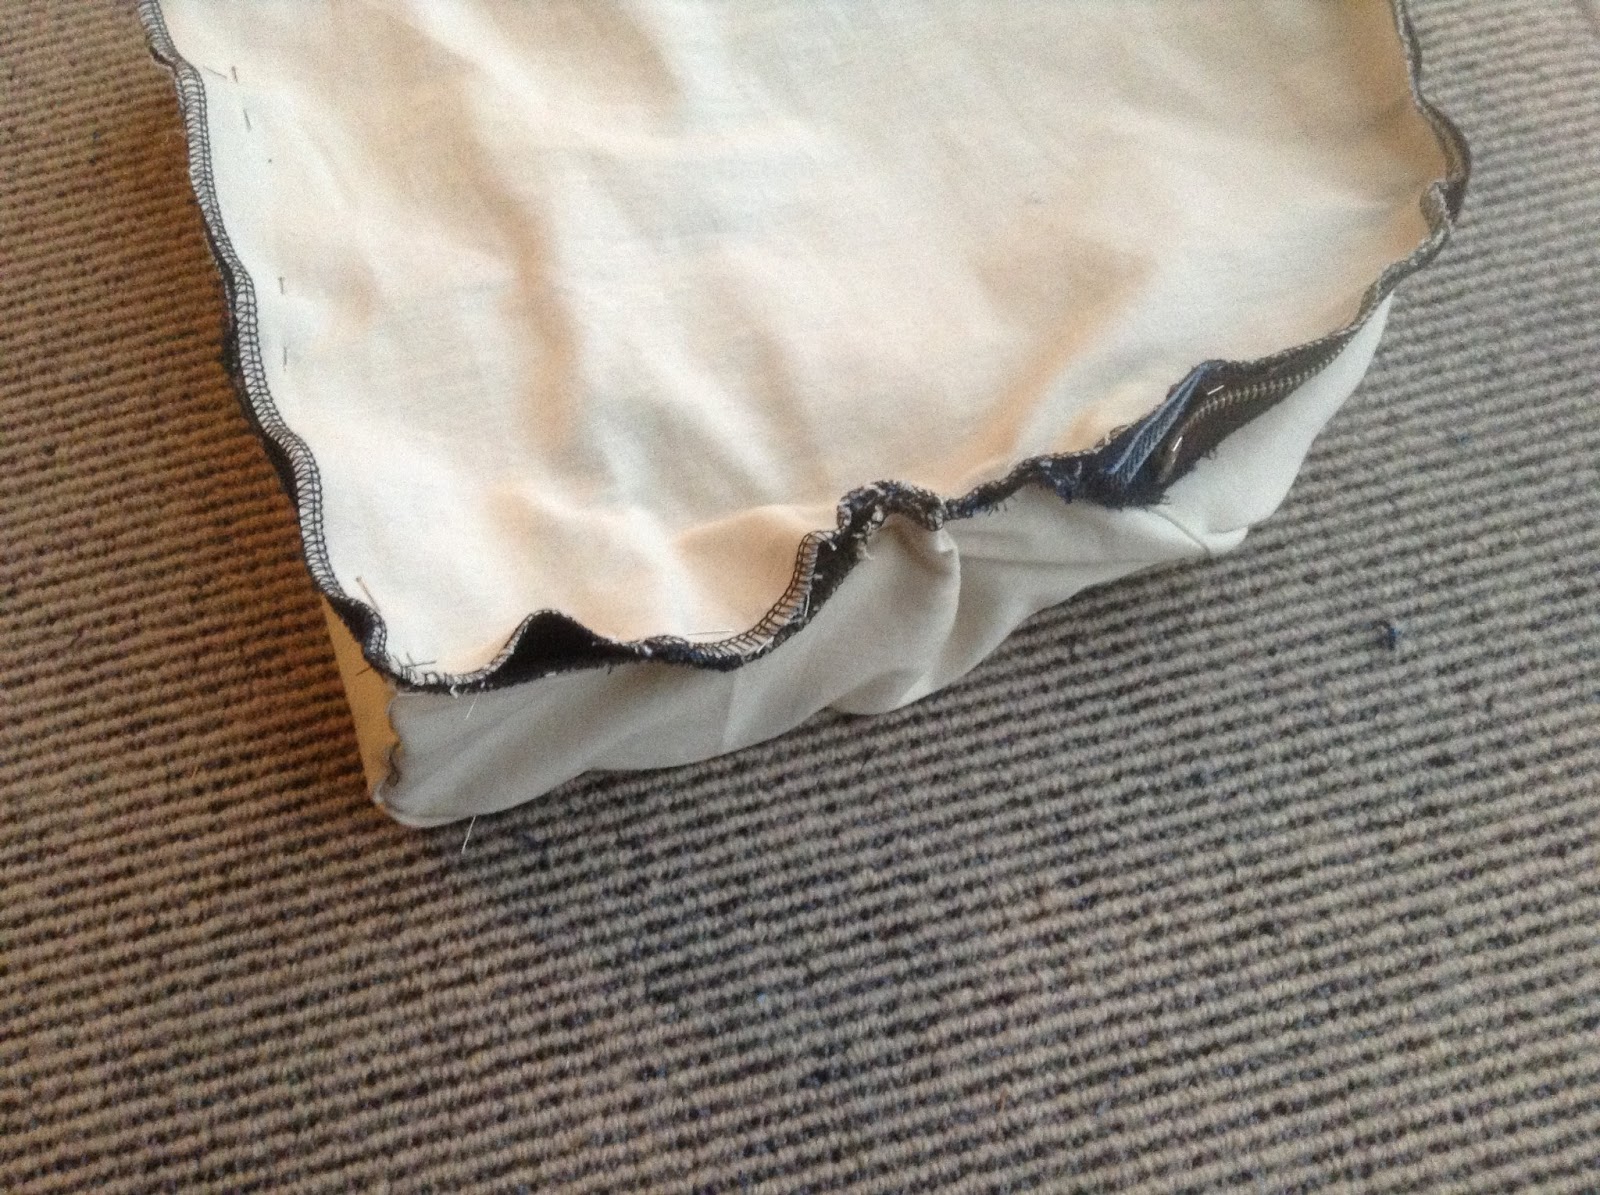
Then sew the base and side pieces together to make corners, as shown below


Attach an end of the top piece to the top of each side piece, making sure the fabric isn't twisted


Pin the top piece along the curved edge of the back piece, distributing fabric evenly


Then start on the pocket.
Start by sewing the side pieces to each side of the front piece


Then attach the base piece to the bottom of the front piece


It should look like this:


Next sew the corners, matching seams so the corner is nice and even 


Then you have the bottom of the pocket


Next sew a big 1.5'' wide hem on the top piece


Then cut two rectangles from scrap denim to make ends for the zipper


Fold these pieces in half and pin one onto each end of the zip 


Sew a line from one edge of the zip to to other, as shown below


Next pin the zip to the pocket bottom, right sides together


It should look like this:


Now for the pocket lining.
Sew the side pieces to the front lining piece


Then sew the base piece along the bottom


Then sew the corners, matching seams


Lastly pin the second front piece to the attached side and base pieces, right sides together as shown below


The you have a lining for the pocket


Place this inside your pocket front and trim the lining to fit so it doesn't overlap the zip


Turn the pocket inside out
Fold the edges of the lining over and pin onto the zip as shown below.
When you have done this topstitch it


Next pin the top pocket piece to the top of the rest of the pocket, where the denim zip ends are and sew


And there you have a pocket!


Now attach the pocket to the front bag piece by pinning the base of the pocket to the middle of the bag, as far up as you would like it. I pinned mine in line with the contrast fabric piece


Next fold in the pocket seams tidily and topstitich the pocket on


A pretty pocket, yay!


Next pin and sew the base piece to the back piece


Then attach the side pieces to the sides of the back piece so that they end where the base piece begins


Then attach the top piece to the top of the side pieces, right sides together


Then sew the top piece along the curved top of the back piece, distributing fabric evenly


Then sew the base corners, attaching the bottom of the side pieces to the sides of the base piece


Next make the handle
Fold the handle piece in half lengthways and pin, then topstitch close to the raw edges


Next find the centre of the top of the back piece and figure out where you want to put the handle


Unpick the section that the handle will go into and push the handle through the hole. Make sure it is folded the right way and not twisted, then sew the seam back up, over the handle piece


Next make the straps
Start by ironing a small hem onto one side of each handle piece


Then sew a larger hem onto the other side that ends in the centre of the piece


Then iron the small hem onto the large one
Sew through the centre, and then take large zig zags back up the straps to create a quilted effect


Attach the straps onto either side of the handle, unpicking and re-sewing the seam as before


Do the same at the bottom of the back piece, attaching the straps to each corner, making sure they aren't twisted


Then attach the lining to the back bag outer
Do this by placing the lining piece you have sewn inside the back outer, wrong sides together
Pin and sew along the entire edge
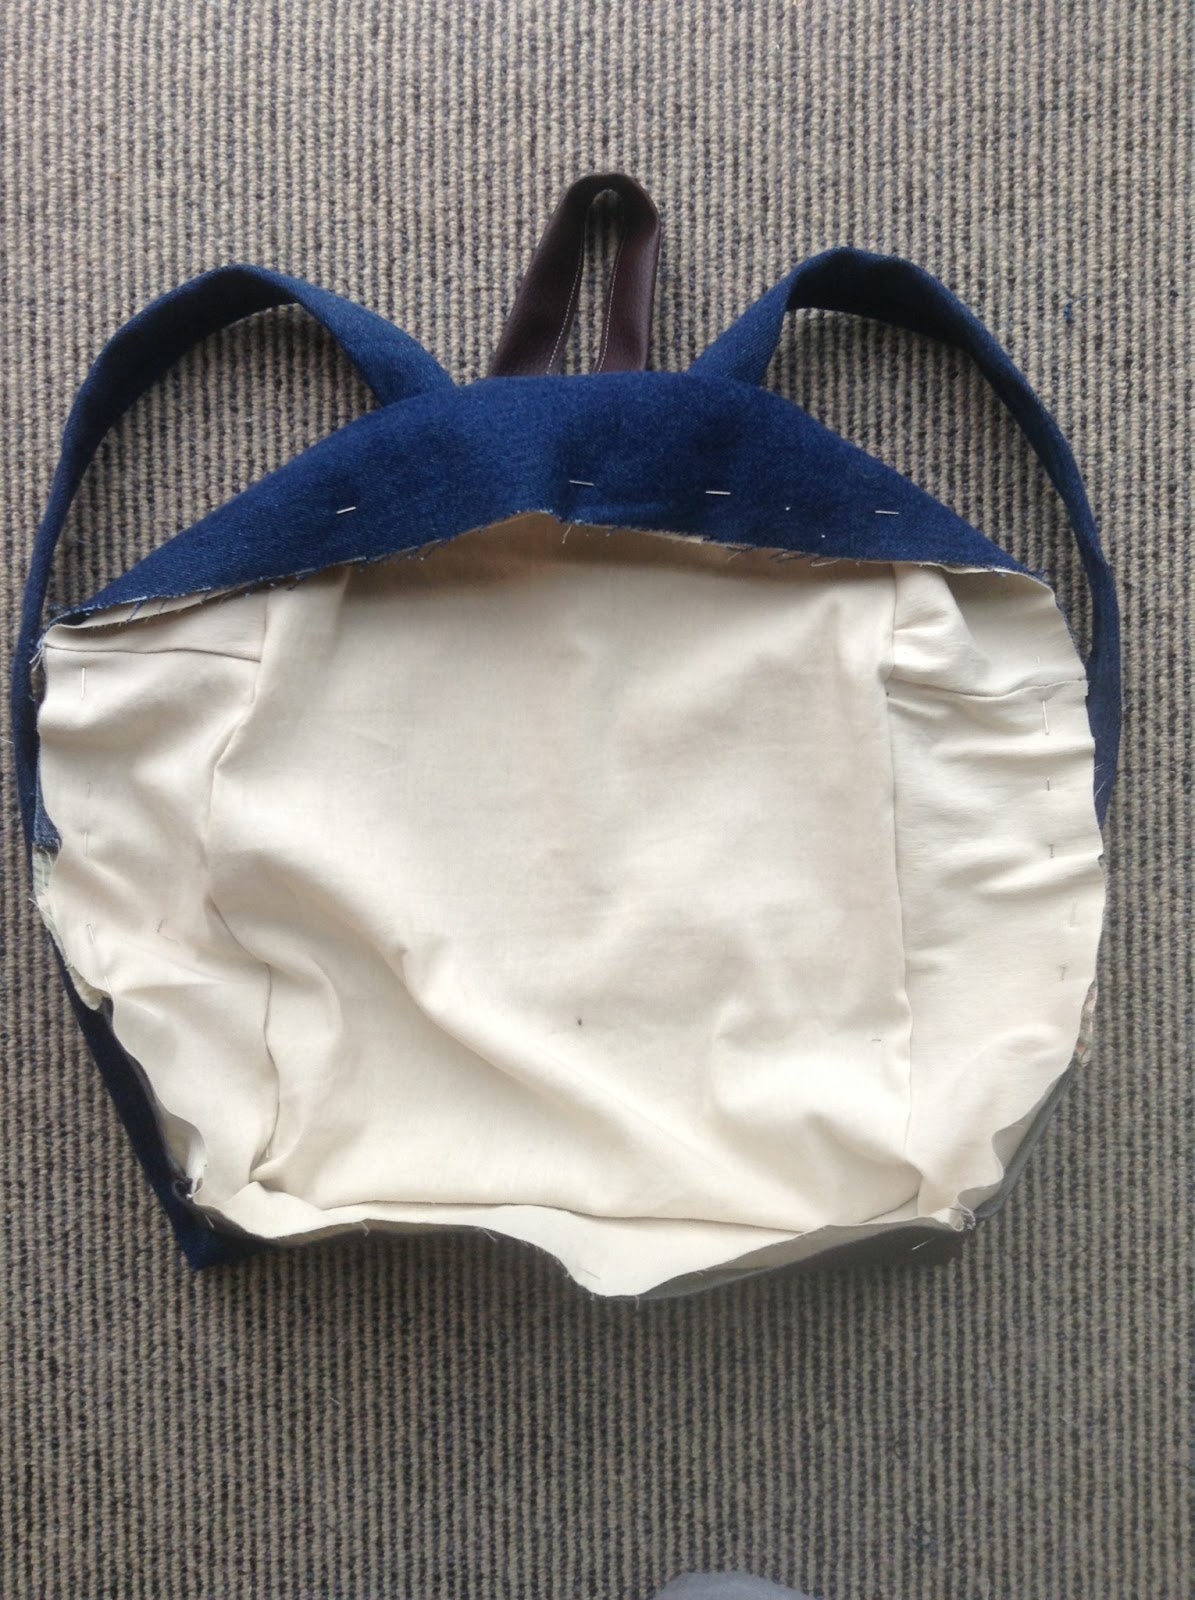


Then place the front lining piece to the front outer piece, wrong sides together and sew around the entire outside


Then cut two rectangles of scrap denim for the ends of the zipper


Fold each rectangle, wrong sides together, and sew one onto each end of the zipper, as shown below


Then pin the zipper to the top of the back bag piece, outer zip facing outer bag


Finally pin the front piece to the back piece and sew around the edge, as shown below


Turn your bag in the right way and you're done!


Backpacks away! 


Saturday, 7 September 2013

Bunting!


Difficulty:


Cost:

This set cost me about $22. The squares of fabric are $5.99 from Spotlight and the bias binding was $3.99. This can be done a lot cheaper if you use up scraps of material that you have left over, but I recommend investing in the bias binding as it makes things very easy. 

Amy here! I'm home right now and I'm using the opportunity to raid the mystical realms of my mother's sewing cupboard. I realise that there are countless bunting tutorials out there but I have a thing for bunting. (Please see accompanying pictures)


 I  think of bunting as a bit of a palaver but really, this probably took me less than three hours to whip up. I'm giving this set to a special friend and I think bunting is one of the best gifts out, it's so personal and it shows that you made an effort. Bunting is also perfect for a flat. As a student there really is not going to be a better time in your life to adorn your living area with lots of  tiny flags.


Tools: 

Scissors
A sewing machine
Cardboard 
Pins


Materials:

A selection of material 
Bias binding 


Method:

To begin I would like to apologise to Ali. She is the fastidious measurer out of us and to be honest, I prefer a "rustic" style when it comes to cutting and sewing straight lines. I'm sure glad she wasn't with me to witness the things I had to do to get a good string of bunting.

Begin by cutting out a template for your flags from cardboard. My template measured about 17cm across the top and 22 cm down each side. I wanted my flags to be about 15cm by 20cm so I ensured that my template took seam allowances into account. Using your template cut out as many flags as you want.


You should have an even number when you are finished as your flags have two sides. At this point, I think it's a good idea to iron your flags as it's easier to work with flat and crisp material. 


Take each pair of flags and pin them together, right sides together. To save time I just put on pin at the top and one at the bottom. 


Then, sew along the long edges of your triangles. You don't need to sew along the top as it will be sewn shut later. When you get to the bottom, stop about 1cm from the end, put your needle in and pivot so that you can sew the other side. 


When you have sewn all your flags you can turn them the right way out. First you need to trim off the excess fabric at the bottom point so you get a nice sharp triangular point.  


Then, turn your bunting the right way out and using a sharp-ish object (I used scissors), poke out the bottom of your flags.


Unravel your bias binding and pin the top of your flags into the binding, folding the one side over the raw edge as pictured. You can leave a gap between your flags or you can sew them right next to one another like I did.


Finally, sew your flags into the bias binding, keeping as close to the bottom edge of the binding as possible. 


Finito! 


Happy days!


Saturday, 31 August 2013

DIY Gatsby headband


Difficulty:


Cost:

$5-$10


This post has been a long time in the coming, but finally it's here!
The Great Gatsby was one of the most wonderful movies we've seen this year; the music, the costumes, the hair, Leo... Beautiful.
So it seemed only fitting that we have a Gatsby themed tutorial, and what better to make, but a gorgeous glittery, golden headband!
This is Ali's take on Gatsby glam, the easy, inexpensive way!


Tools:

Scissors
Needle and thread
Sewing machine


Materials:

Black 15mm elastic
3 types of trim


First up, measure the circumference of your head and then subtract 10mm.
This is the total length your headband should be, allowing for elastic stretch. From this total, decide how long you want the elastic section to be, mine was around 9cm long. 
The remaining length is the amount of trim you will be using.

So once you've figured out the measurements, it's time to start sewing!
I started by pinning a length of gold trim onto each end of my white trim as below.


I then sewed these pieces on using my sewing machine, first with a straight stitch, then a tight zigzag for strength.


I then pinned one end of my elastic piece onto the gold trim,


I sewed this on as before, using a straight and then zigzag stitch.
Repeat this step and attach the other end of the elastic to the other piece of gold trim to create a loop.


Lastly, I hand stitched my third piece of gold trim onto the front white piece.


Fin!
Now you have a glamorous headband all you have to do is put on a sequinned dress, curl your hair and we might all start calling you Daisy. 


Good job old sport!


Great Gatsby Themed Red Card Party


Having made the appropriate head-wear, it was only fitting that we have a Gatsby themed event to show it off at!

So when Tom, Amy's boyfriend and Ali's flatmate, decided he would have a Great Gatsby themed Red Card*, we were both super excited! 
With Tom's permission we were allowed to be in charge of decorating Ali's flat for the event, so we invested in some gold and silver glitter and got started!
We had both been collecting glass jars bound for the recycling bin so we had all sizes and shapes of jar from jam to pasta sauce. These are a cheap and eco friendly alternative to buying mason jars, which have become pricey following their rise in popularity. Plus, once the labels are washed off, these jars make an eclectic and beautiful collection of odd shapes and styles, which just look gorgeous together.
We then got to glittering them, following this tutorial.


We had clusters like the one above around the room, and they were all made using recycled glass. The only things you have to buy are glitter and candles, yay! Amy upped the classiness even further with some pink carnations as well, aren't they lovely?

Below is the Great Gatsby himself (AKA Tom), looking mighty dapper with his cigar and martini.
Behind him you can see some black and white balloons Amy and I filled with gold stars and attached to a string which crossed the room. Amy also pulled out a few strings of bunting that she has had for a while, perfect for a bit of old fashioned style. 


And how lovely do these two look, a wonderful Daisy and Gatsby.
Amy complete with a glamorous sequin and feather headband which she made herself.


Here we have Tyler and Ali, looking sophisticated and ever so well put together.


But clearly the most glamorous couple of the night were Nick and Devika, allegedly the next Jay-Z and Beyonce. 


All in all, everyone was looking pretty darned good, and they knew it too. 
Boys sure do like suiting up! 


And then to finish off the night the lads retired outside to enjoy their cigars.


*Red Card: Event organized by one of your flatmates (in this case Ali's flatmate Tom), which all other flatmates must attend, usually involving costumes and alcohol consumption.

Ain't no party like a Gatsby party!