

Difficulty:

Cost:
This shirt cost me $8, I wouldn't recommend spending more than $10 on a shirt for this tutorial
Hi! Amy here! A while ago, Ali and I were walking through town in Dunedin on one of our many op shopping outings and we saw this girl with the coolest backpack that we have ever seen. It appeared to be made out of a man's shirt and all the pieces were intact; the collar, the cuffs, the buttons down the front. Needless to say we stopped her and asked if she had made the bag herself and how she did it. The girl had bought the bag in Sydney and wasn't too sure if it was made out of an actual man's shirt or simply made to look like it. The bag made an impression on both of us and I decided to try my hand at making one. I came across a beautiful vintage Hugo Boss shirt in a pale lavender with a green pattern, I wanted a heavier weight to the shirt as I couldn't be bothered lining it, unlike the labour of love Ali created here. You could use a denim shirt or even a corduroy shirt for this tutorial but I was worried that my sewing machine wouldn't cope with the thickness of the fabric. This backpack would make a great gift for a boy or a girl and is super easy to whip up.
Tools:
Scissors
Sewing Machine
Pins
Materials:
A man's collared shirt
Some rope for a drawstring

Method:
Begin by cutting the shirt that you have into four different pieces. The main part is going to be the bag itself, the two arms will be the shoulder straps and the collar will make a flap to cover the drawstring at the top of the bag.

My shirt was a large size so I needed to cut it down. Taking the main piece, cut off the seams and re-sew them. Essentially you are taking it in at the seams by a few centimetres- you may not need to do this if the shirt you bough is a small.

The main piece should not look like this, with raw top edges and unsewn on the bottom.

Pin along the bottom of the shirt following the slightly dipped line that is already there. This needs to be exaggerated so that the bottom of the bag is rounded- you can see from the pins in the photo below how to pin it. Sew the bottom of the bag closed. Once you have done this you can trim off the extra fabric in the seam and overlock it if you like.

Next, pin and sew the "underarm" part of the shirt.

The next step is to start the drawstring. Fold over about a centimetre or two of the fabric at the top of the shirt and sew close to the raw edge. You shouldn't sew it all closed as you won't be able to insert your drawstring- leave a two centimetre gap over the button piece.

Make sure when you are pinning your drawstring that you don't sew shut the front pocket. This can be a bit tricky as there isn't that much fabric to work with. However, it is possible to fold the material for the drawstring but avoid the pocket.

This is what the final bag piece should look like, the drawstring itself will be inserted later.

Now to begin the front flap.

Round out the raw edges of collar piece.

Turn this piece inside out, pin, and sew up the seams.

Moving onto the arms or shoulder straps.

Turn the sleeves inside out and run a sew up the side. This is to make the sleeves thinner and straighter. As you can see from the photo above the sleeves are rather triangular and not great for straps, this is why this step is necessary.

The two sleeves should now be much straighter with a raw edge at the top.

Fold the raw edges inwards and top stitch over so that sleeves are neat.

All the pieces are finished and ready for putting together now.

Attach the sleeves to the top and bottom of the bag. I decided to leave the top of the cuff loose, sewing the sleeve just on the underside at the bottom of the bag.

Place the collar piece on the back of the bag and pin it in place, it should be able to fold over the the other side. You only need to attach the flap by about three centimetres on either side of the button piece.

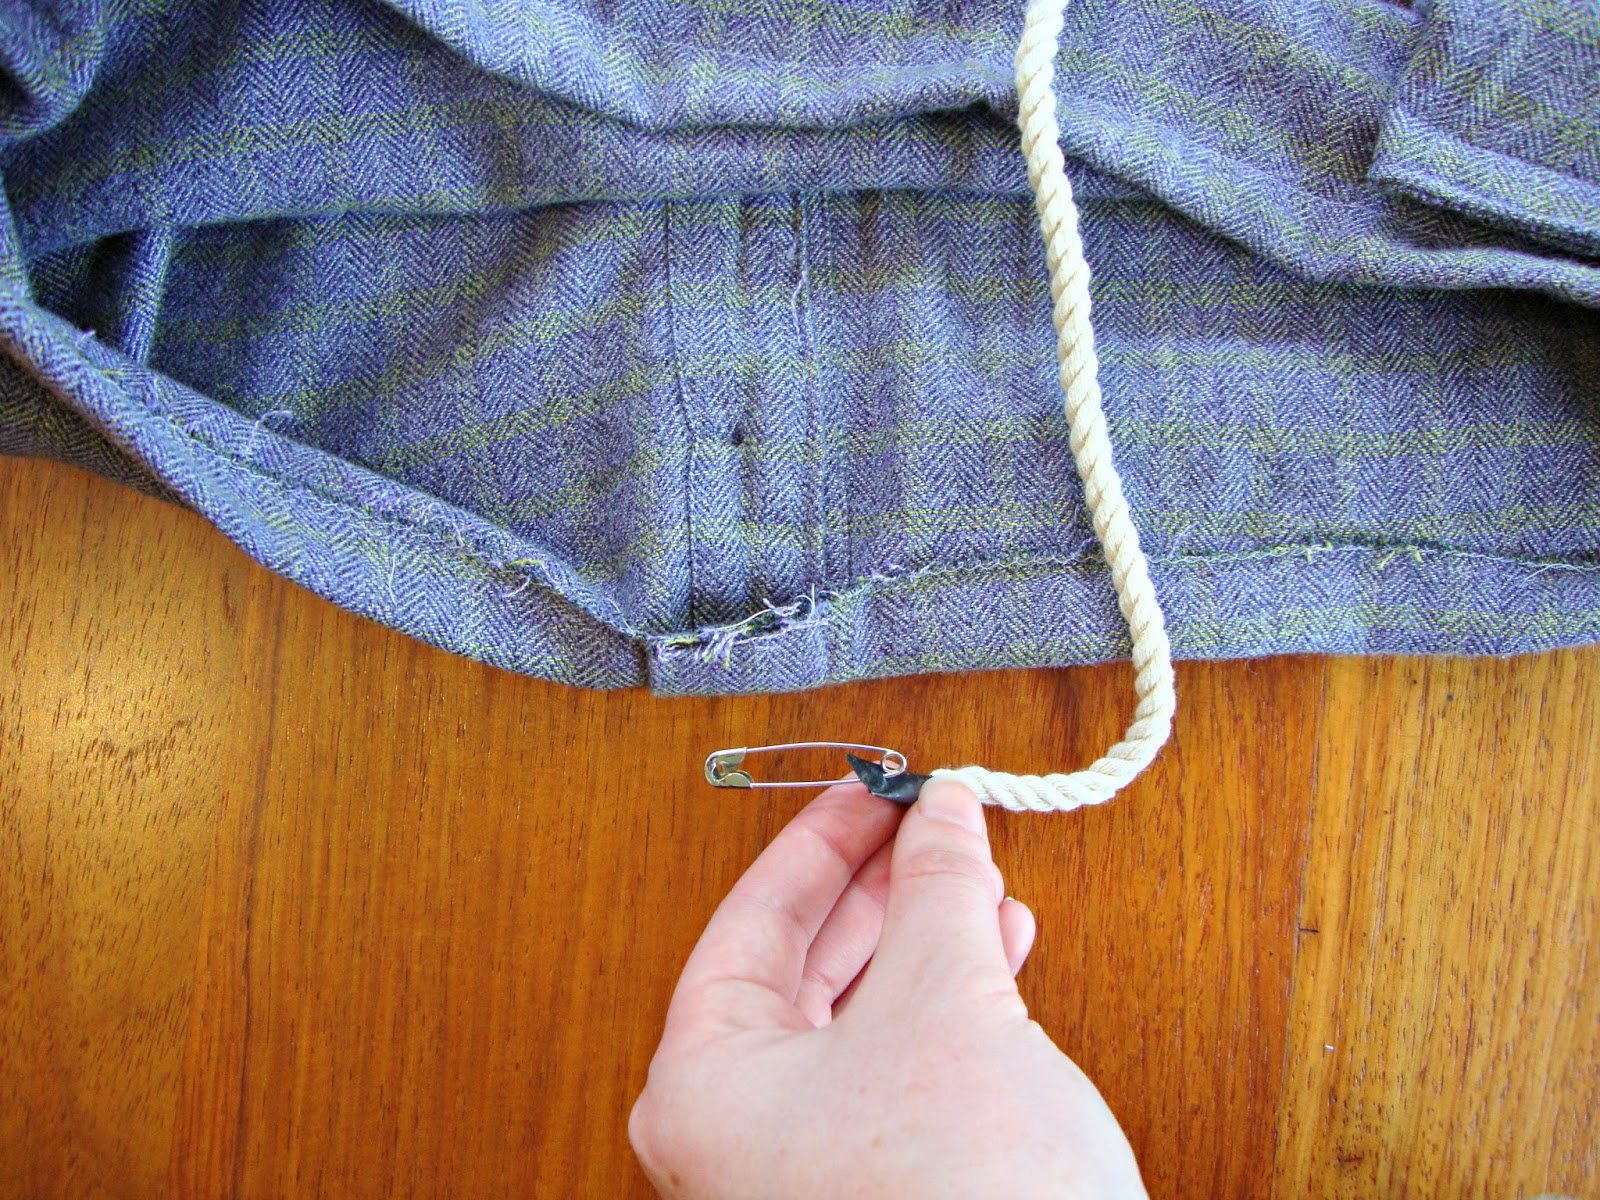
One of the last steps is to put in the drawstring. I taped the one end of my string and used a safety pin as a guide; it is much easier to push a safety pin through the drawstring casing than just the rope. The drawstring needs to go round the casing twice (as it makes it easier to pull it closed) and you should be left with a piece of rope on either side of the casing.
Finally, sew a press stud on to the front flap to secure it to the bag.

Love the crazy bag ladies!

Love this!
ReplyDeleteI love it
ReplyDelete